
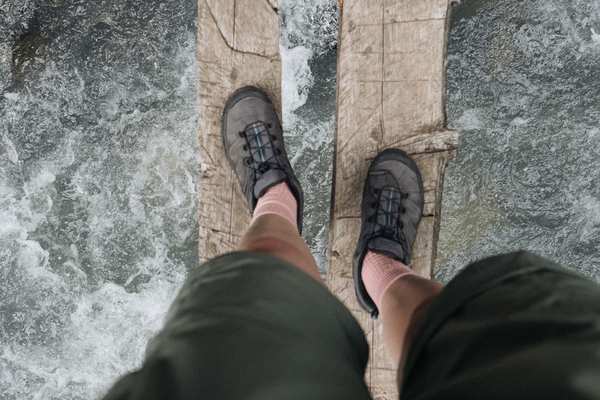
A river that looked harmless on a map can become the most consequential decision of a hike. Snowmelt, overnight rain, a damaged bridge, or a braided channel can turn an ordinary trail into a moving-water hazard where a poor choice has immediate consequences. Good river crossing safety while hiking starts before your boots touch the water: the first question is not “How do I get across?” but “Do I need to cross here, right now?”
Assess the Crossing Before You Commit
Stop on the bank and watch the water for several minutes. Look at its speed, depth, colour, surface patterns, and what lies downstream. Fast, opaque water is especially difficult because you cannot see holes, loose rocks, or submerged timber. Standing waves may indicate boulders or uneven ground, while rolling rocks that can be heard in the channel are a sign of powerful flow.
Depth alone is not a complete measure of danger. Current matters just as much. A shallow, fast stream can sweep a hiker off balance, while a deeper pool with almost no current may be less forceful. As a conservative rule, avoid wading through moving water around knee depth or deeper. If you cannot judge the bottom or feel confident about your footing, treat that uncertainty as a reason to look for another option.
Check What Happens If You Fall
Before choosing a line, look downstream. Avoid crossing above waterfalls, rapids, logjams, steep drops, undercut banks, or channels where a swimmer could be pinned against debris. Identify a realistic place where someone could reach shore if they lost footing. Backcountry river safety is not only about staying upright; it is also about limiting the consequences of a mistake.
Find a Better Place, Not Just the Obvious Place
The trail may arrive at the river at a poor crossing point. Walk upstream and downstream where terrain allows. Wider, straighter, or braided sections are often shallower and slower than narrow channels or the outside of bends. An island or gravel bar can sometimes divide one difficult ford into two easier ones.
Do not assume a log is automatically safer than wading. Wet wood can be extremely slippery, and a fall from a log may put you directly into fast water. If a bridge, maintained ford, or clearly safer alternate route is available, use it even when it adds distance.
Timing Can Change the Same River Completely
Water levels can rise quickly after rain, during storms upstream, or during periods of rapid snowmelt. Glacial and snow-fed streams may be lower in the cool early morning and significantly higher later in the day. Local conditions matter, so check ranger reports, weather, recent rainfall, and trail updates before committing to a route with hiking water crossings.
A practical scenario makes the point: you reach a creek at 4 p.m. after a warm day and the current is pushing hard against submerged rocks. The route is only two kilometres from camp, but dark clouds are building upstream. Continuing because the destination is close is exactly the kind of pressure that leads to bad decisions. Waiting, retreating to safe ground, or using an alternate route can be the better choice.
Prepare Yourself and Your Pack
Never cross barefoot. Secure footwear gives better traction and protects against sharp rocks, submerged branches, and unstable gravel. Trekking poles or a sturdy staff can add another point of contact and help probe the riverbed before you shift your weight.
Waterproof critical items inside your pack, especially insulation, fire-starting supplies, and communication gear. Before entering moving water, release your pack’s hip belt and sternum strap so you can shed the pack quickly if you fall. Do not tie yourself to a rope or to your pack while crossing; entanglement in current can make a bad situation worse.
Move Slowly and Keep Stable Contact
Face generally upstream and move at a slight angle toward the opposite bank, yielding to the current rather than fighting directly across it. Shuffle your feet instead of taking high steps, and make sure each foot is stable before moving the next. Use a pole upstream when practical and keep at least two points of contact with the riverbed.
Avoid staring continuously at swirling water around your feet, which can make balance harder. Look toward the far bank while checking your next step as needed. If the force of the water increases, the bottom suddenly drops, or you begin to lose control, retreat while you still can.
Manage the Group, Not Just the Individual Crossing
Group spacing matters around stream-crossing hiking hazards. Keep people waiting well back from slippery banks, and avoid sending the entire group into uncertain water at once. One person can assess from a safe position while another watches downstream and keeps communication clear. Less experienced hikers should not feel pressured to follow simply because someone else crossed.
Some official backcountry guidance describes linked group techniques for swift water, but these methods require coordination and can create additional risk when improvised. If the crossing is difficult enough that you believe a special group formation is necessary, that is also a strong signal to reconsider the crossing unless your group has the appropriate experience.
Know the Signs That Mean Turn Back
Turning around is a core hiking skill, not a failed objective. River conditions deserve the same respect as lightning, avalanche terrain, or unstable cliffs. Leave the crossing when the current is strong enough to disturb your stance, the depth cannot be judged, the water is near or above your knees and moving, the bottom is unstable, or dangerous obstacles lie downstream.
Also turn back when weather is worsening, daylight is running out, someone in the group is cold or exhausted, or the return crossing may be harder later. One of the most overlooked trail hazards is the river you cross safely in the morning but cannot recross after rain or afternoon melt raises the flow.
What to Do After a Difficult Crossing
Once everyone is safely across, move away from the water’s edge. Check feet for cuts, change into dry socks or insulation if needed, and address cold stress early. Shivering, clumsiness, confusion, or slurred speech can signal hypothermia and require prompt action. A successful crossing is not finished until the group is warm, accounted for, and ready to continue safely.
Frequently Asked Questions
How deep is too deep for a hiker to cross?
There is no single depth that is safe in every river because current, footing, temperature, and body size all matter. National Park Service guidance commonly advises avoiding moving water deeper than about knee level. Faster water should be shallower before you even consider crossing.
Should I take off my hiking boots for a river crossing?
No. Crossing barefoot reduces traction and exposes your feet to sharp rocks and submerged debris. Wear secure boots, trail shoes, or suitable protective crossing footwear.
Is it safer to cross a river alone or as a group?
A group provides spotting, communication, and help with decision-making, but several people entering unstable water together can create new problems. Space hikers safely, assess conditions first, and use coordinated group techniques only when the group knows how to perform them.
What if I reach a river and cannot cross safely?
Wait for conditions to improve, scout for a safer ford or bridge, use a planned alternate route, or turn back. Never let schedule pressure, proximity to camp, or another hiker’s decision override the conditions in front of you.
Make the Crossing Decision Before the Crossing Technique
The most valuable river-crossing skill is judgment. Strong hikers can still be knocked down by cold, fast water, and familiar trails can change after a single storm. Scout widely, read the current, protect your footing, watch downstream hazards, and preserve an easy retreat. When the river does not offer a clear margin for error, the safest route is the one that keeps you on the bank.